
Understanding methamphetamine decontamination guidelines can seem complex, but the primary goal is simple: making a property safe for human habitation again. The critical threshold in Australia is 0.5 micrograms (µg) per 100 square centimetres (100 cm²). Every step in a professional meth cleanup process is designed to reduce chemical residues to below this health-based safety limit, ensuring the environment is thoroughly remediated.
Decoding Your Obligations Under Australian Meth Decontamination Guidelines
When you're dealing with potential meth contamination in a workplace, knowing your responsibilities isn't just important—it's critical. This isn't just about busting former drug labs. The real, and often invisible, danger comes from 'third-hand' exposure, which is the residue left behind by users.
This sticky, unseen contamination can coat everything from machinery and office desks to camp accommodation and break room surfaces. The risk here is that your employees can unknowingly absorb these toxic chemicals through their skin or by touching a contaminated surface and then their mouth. Over time, that exposure can lead to serious health problems.
The Australian Regulatory Framework
Australia's regulatory scene is a bit of a patchwork, unlike New Zealand, which has a single national standard (NZS 8510:2017). Here, the rules are mostly managed at the state and territory level. While this means you might see slight differences in how things are enforced, everyone is working towards the same nationally recognised target.
- The National Guideline: The go-to document is the Clandestine Drug Laboratory Remediation Guidelines. This is where the 0.5 µg/100 cm² health investigation level is set. It’s not just a random number; it's a carefully calculated, risk-based threshold designed to protect public health.
- State-Specific Requirements: Some states, like Western Australia and Queensland, have their own detailed guidelines. They still follow the national standard but might have extra rules for reporting or specific procedures you need to follow.
- Voluntary Codes of Practice: On top of government rules, many industry bodies have adopted voluntary codes. These essentially reinforce the official guidelines and set a high bar for best practice among remediation contractors and occupational hygienists.
Following these methamphetamine decontamination guidelines is more than a box-ticking exercise. It's a core part of your duty of care to provide a safe workplace. Before you even think about starting a clean-up, it’s worth understanding what makes remediation work. For instance, it's crucial to start by differentiating between sanitizing and disinfecting, as the terms mean very different things in the context of chemical clean-up.
The real problem with meth residue is that it’s incredibly persistent. It doesn’t break down or fade away like mould or bacteria. It will stay on a surface indefinitely, posing a continuous risk until it's physically removed through a proper, verified cleaning process.
Recognising that this hidden danger could exist is the first move towards managing it responsibly. If you have any doubts about a property, understanding the reasons to test properties for methamphetamine can give you the clarity you need. Taking a proactive stance doesn't just protect your team and your assets; it ensures you're meeting your legal and ethical duties head-on.
Conducting an Initial Site Assessment
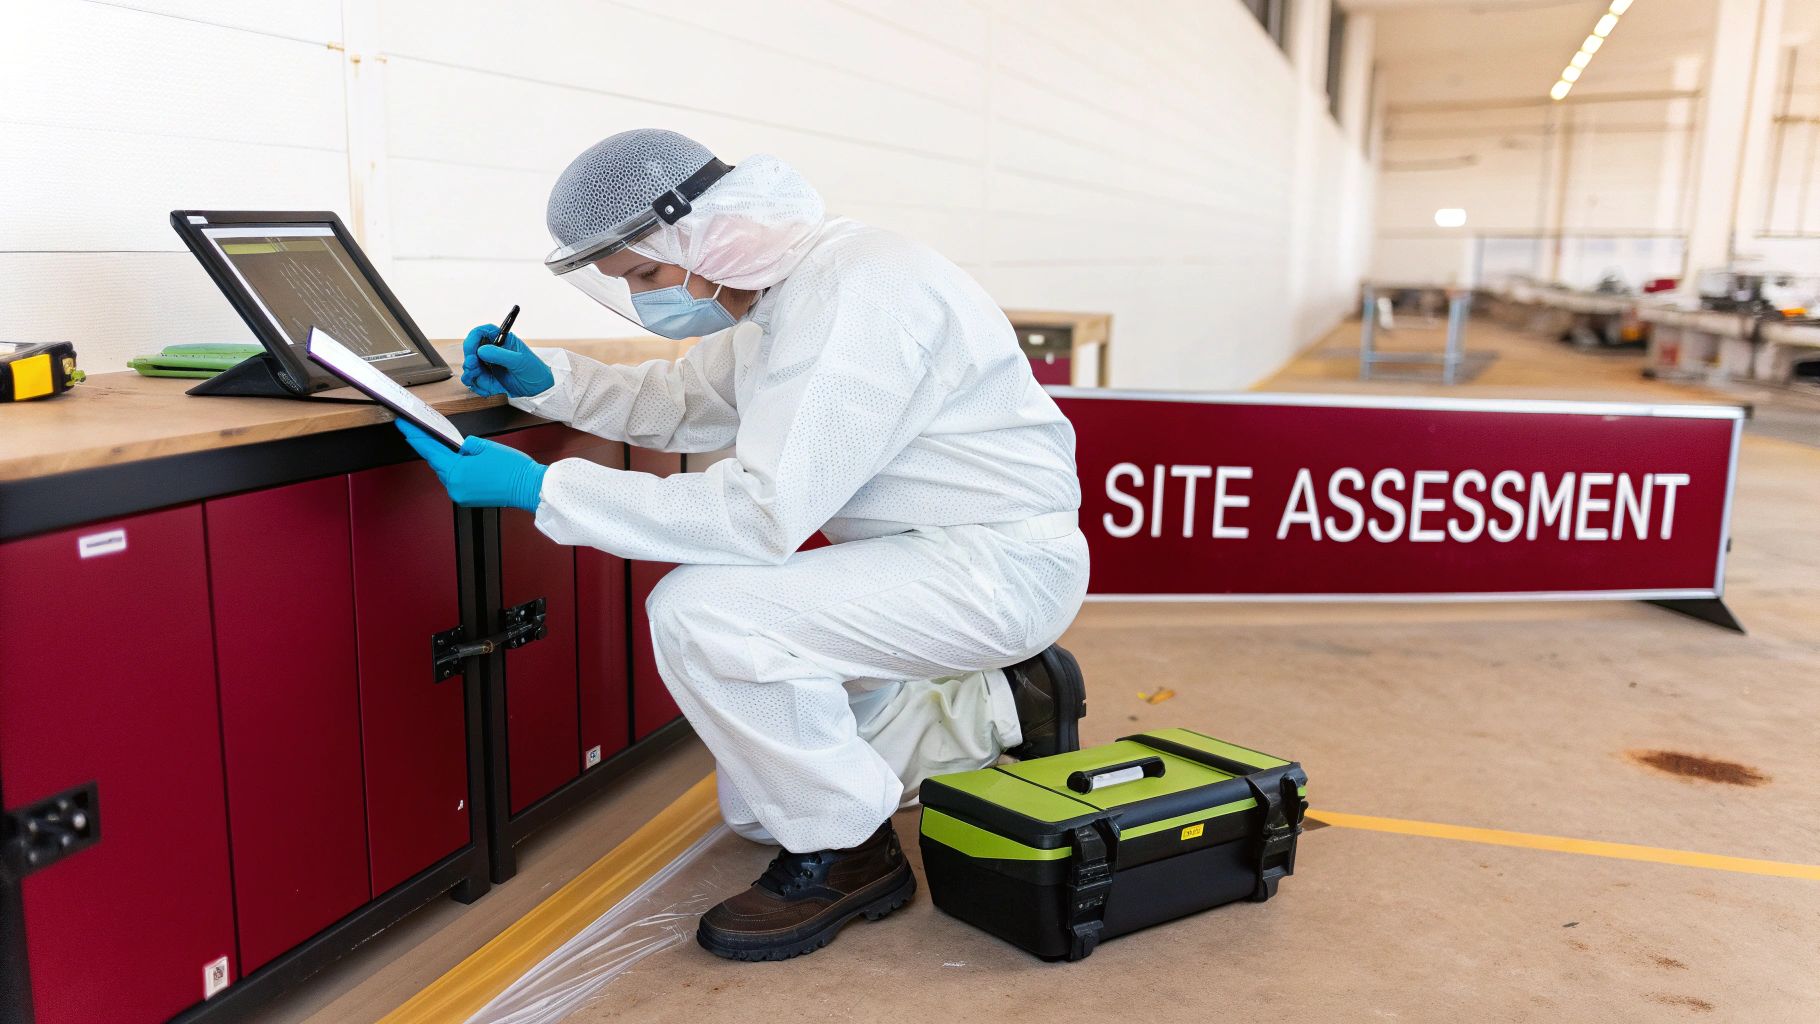
Before we even think about mixing a cleaning solution or scrubbing a surface, everything starts with a thorough site assessment. This initial investigation is the absolute bedrock of any successful remediation project and forms the basis for all methamphetamine decontamination guidelines. If you rush this part, you're setting yourself up for overlooked contamination and, almost inevitably, failed clearance tests later on.
The first walk-through is all about observation. But here’s a critical point many people miss: meth residue is almost always invisible and has no smell. Heavy manufacturing might leave some obvious signs, but the residue from personal use is undetectable to the naked eye. It’s a common and dangerous misconception that a place has to look dirty to be contaminated.
Our field experts are trained to see beyond the obvious. This initial phase isn't just a quick look-around; it’s a detailed intelligence-gathering operation to build a complete picture of the potential risk.
Identifying Potential High-Risk Zones
The key to an efficient cleanup is strategically identifying the high-risk zones. Contamination is rarely spread evenly; it tends to pool in specific areas depending on how the space was used.
During an assessment, we analyse the property’s history and layout to pinpoint these hotspots. For instance, in a remote mining camp, we’d immediately focus on common rooms, individual dongas, and the HVAC systems. In a factory or workshop, it might be a specific maintenance bay, a break room, or a quiet storage area.
There are a few key areas that almost always warrant a closer look:
- Ventilation and HVAC Systems: These are notorious for circulating contaminated air and spreading residue far from the original source.
- Kitchens and Bathrooms: The exhaust fans and numerous hard-to-reach surfaces in these areas are perfect traps for airborne particles.
- Porous Surfaces: Things like unsealed concrete, raw timber, and soft furnishings (office chairs, carpets, partitions) can absorb and hold onto meth residue, making them a real headache to decontaminate.
Following this process lets us take a targeted approach. It means we can focus the subsequent sampling and cleaning where it’s needed most, rather than wasting time and money on low-risk areas.
The goal of the initial assessment isn't to get a final contamination reading—that’s what lab testing is for. The goal is to figure out where to look, so we can create a methodical plan for the detailed scientific investigation to follow.
The Role of Field Screening Tests
Once we’ve mapped out the potential high-risk zones, field screening kits give us valuable, real-time insights. These presumptive tests are a cost-effective way to get a quick "yes" or "no" on the presence of methamphetamine residue. Think of them as a first-line diagnostic tool.
Now, these kits are no substitute for proper quantitative lab analysis. They can't tell you the concentration of the residue or if it's above the Australian health investigation level of 0.5 µg/100 cm². Their real value is in helping us make smart decisions on the spot.
A positive result from a field test in a suspected area gives us solid justification to proceed with a full-scale, lab-based sampling plan. On the other hand, if we get negative results across multiple areas, it might suggest widespread contamination is unlikely—though it doesn't rule it out completely.
Ultimately, a good initial site assessment combines visual inspection, risk-zone identification, and preliminary screening to make informed choices. It's the first and most crucial step in any compliant and successful decontamination project, ensuring every action is based on evidence, not guesswork.
Mapping the Problem: Your Guide to a Comprehensive Sampling Strategy
Once an initial screening test flags a potential issue, the game changes. We move from "what if" to "what now," and this is where a methodical, scientific sampling plan becomes the bedrock of your response. Think of it as creating a detailed contamination map. Without this map, you're navigating blind, and any cleanup effort is just guesswork.
A proper sampling strategy is the engine room of an effective Remediation Action Plan (RAP). It gives us the hard data needed to understand exactly what we're dealing with—how widespread the contamination is and how concentrated it is in different areas. Get this wrong, and you risk incomplete cleanups, failed clearance tests, and putting your people's health on the line long-term.
Discrete vs. Composite Sampling: Knowing Which to Use and When
In the world of quantitative meth testing, we have two main tools in our belt: discrete and composite sampling. Understanding the pros and cons of each is crucial for building a strategy that's both accurate and cost-effective.
Discrete sampling is straightforward. We take a single wipe sample from a specific 10cm x 10cm area and send it to the lab for its own individual analysis. This gives you a precise contamination level for that one spot. It’s the gold standard for post-remediation clearance testing, where you need to prove a specific, previously contaminated area is now definitively clean.
Composite sampling, on the other hand, is a bit different. Here, we collect multiple wipe samples (usually up to four) from various locations and combine them into a single vial for analysis. It's a fantastic screening tool for large, low-risk areas. If the composite sample result comes back under the Australian guideline of 0.5 µg/100 cm², you can be reasonably confident the whole area is clear, saving a bundle on lab fees.
But there's a catch. If that composite sample fails, you have to go back and take discrete samples from all the original spots to find out which one (or ones) caused the high reading.
A common mistake I see is people trying to cut corners by using composite sampling everywhere. If you already have a strong suspicion that an area like a small, poorly ventilated office or a kitchen is contaminated, using a composite sample there is often a false economy. You’ll likely just pay to confirm your suspicion, then have to pay again for the discrete samples needed to pinpoint the hotspots.
The Right Way to Take a Wipe Sample
To get results that stand up to scrutiny, the sample collection process itself has to be meticulous. This isn't just a quick wipe with a cloth; it’s a forensic procedure that follows a strict, standardised methodology.
- Prep is Key: First, the hygienist puts on a fresh pair of nitrile gloves. This happens for every single sample to prevent cross-contamination. A sterile 10cm x 10cm template is then placed securely on the surface.
- The Collection: Using a sterile cotton swab or gauze pad wetted with a solvent like methanol or isopropanol, the entire area inside the template is wiped. The technique is specific: first horizontally, covering the whole square, then the swab is flipped, and the same area is wiped again vertically.
- Secure Storage: The swab goes straight into a sterile, sealed vial. No delays.
- Meticulous Labelling: Every vial gets a unique sample number and is clearly labelled with the date, time, and exact location it was taken from. Vague descriptions like "wall sample" won't cut it.
Following this process is non-negotiable. Any deviation can throw the results into question. For a deeper dive into the science, our guide on professional meth testing for properties explains why these protocols are so critical.
Choosing Where to Sample: A Game of Strategy
Knowing how to sample is only half the battle; knowing where is what separates a good assessment from a great one. The objective is to find the worst-case areas to accurately define the boundaries of the problem. We zero in on high-contact surfaces and spots where airborne meth particles are most likely to land and accumulate.
In a workplace, these hotspots are often predictable:
- HVAC Systems: Air conditioning vents, returns, and filters are notorious for spreading contamination far and wide. They absolutely must be checked.
- Kitchen & Bathroom Surfaces: Think exhaust fans, benchtops, and splashbacks. These areas often have sticky surfaces and airflow patterns that trap residues.
- High-Touch Points: Light switches, door handles, and machinery controls are touched constantly, making them key points for potential exposure.
- Surface Types: We have to consider how different materials hold onto contamination. Porous surfaces like raw wood or fabric are very different from non-porous surfaces like stainless steel or laminate.
This isn’t just theory. A comprehensive Queensland study found that kitchens and bathrooms consistently had the highest residue levels. It also showed that laminated and painted surfaces retained significantly more contamination than other materials. You can discover more insights from this contamination study to see how residue behaves in the real world.
To help guide this process, it's useful to think about surfaces in terms of their risk profile.
Common Surfaces and Contamination Risk Levels in Workplaces
This table breaks down typical surfaces you'd find in a workplace and their general risk level for retaining methamphetamine residues. This helps us prioritise our sampling efforts to get the most meaningful data.
| Surface Type | Porosity | Typical Contamination Risk | Example Location (in a workplace) |
|---|---|---|---|
| Stainless Steel | Non-porous | Low-Medium | Kitchen benchtops, machinery casings |
| Laminated Surfaces | Semi-porous | High | Desks, cabinet doors, benchtops |
| Painted Plasterboard | Semi-porous | High | Walls and ceilings |
| Unsealed Concrete | Porous | High | Warehouse floors, workshop areas |
| Upholstery/Carpet | Porous | Very High | Office chairs, breakout area carpets |
| Ceiling Tiles | Very Porous | High | Office ceilings, suspended ceilings |
| HVAC Filters | Very Porous | Very High | Air handling units, return air vents |
By understanding these differences, we can build a much smarter sampling plan that targets the most likely problem areas first.
The Final Piece: The Chain of Custody
Finally, let's talk about paperwork. Every single sample we collect is documented on a Chain of Custody (CoC) form. This is a legal document that creates an unbroken trail, tracking the sample from the moment it leaves the surface to the moment it’s analysed at the lab. It records every single person who handles it.
An airtight CoC is non-negotiable. It’s what guarantees the sample wasn't contaminated or tampered with along the way. It’s what makes the lab results legally defensible and turns a simple cotton swab into powerful, reliable evidence.
Putting Your Remediation Action Plan into Motion
Right, you’ve done the hard yards with the assessment and have a clear map of the contamination hotspots. Now it’s time to roll up your sleeves and get to the practical, hands-on stage: the cleanup itself. This isn't something you can just wing; every move from here on out needs to be dictated by a formal Remediation Action Plan (RAP).
Think of the RAP as your blueprint for a successful and, just as importantly, legally defensible decontamination project. It’s far more than a simple to-do list. This is a detailed strategic document spelling out the specific cleaning methods, the chemicals you'll use, all the necessary safety protocols, and exactly how contaminated waste will be handled. Trying to clean a site without a solid RAP is like sailing without a rudder—it’s disorganised, unsafe, and almost guaranteed to fail the final clearance testing.
The Nitty-Gritty of Cleanup Techniques
At its core, the cleanup boils down to two main strategies: physically turfing out heavily contaminated items and giving salvageable surfaces an intensive chemical clean. The deciding factor almost always comes down to the material's porosity – basically, how easily it can soak up and hang onto that meth residue.
Porous materials are your biggest headache. Things like carpets, unsealed timber, curtains, and most office furniture act like sponges for methamphetamine contamination. Honestly, trying to clean them is often a losing battle. In the vast majority of cases, the safest, most reliable, and ultimately most cost-effective approach is to rip them out and dispose of them correctly.
On the other hand, non-porous surfaces like sealed benchtops, metal fixtures, and glass can usually be saved. But this isn’t a job for a simple spray and wipe. It requires a rigorous, multi-stage cleaning process to be effective.
Here's a tip from the field: one of the most common mistakes we see is people underestimating the power of good old-fashioned elbow grease. You can have the best chemical cleaners on the market, but without vigorous scrubbing to physically break that bond between the residue and the surface, you’re just moving the contamination around.
Locking Down the Site with Robust Safety Protocols
Before anyone even thinks about opening a bottle of cleaning solution, the site has to be completely secured. This is about protecting both the remediation team and the wider environment, and it’s a non-negotiable part of all Australian methamphetamine decontamination guidelines.
First, you need to set up strict containment zones. This usually means using heavy-duty plastic sheeting to completely seal off the affected areas from the rest of the building. To stop contaminated dust and vapours from escaping, these zones are put under negative air pressure. This is done with specialised air filtration devices (air scrubbers) fitted with HEPA filters that suck air in, trapping contaminants.
Worker safety is absolutely paramount. Anyone stepping inside that containment zone must be kitted out in the right Personal Protective Equipment (PPE). The exact level of PPE will depend on the contamination readings, but the standard kit includes:
- Disposable, full-body coveralls to stop any skin contact.
- Nitrile gloves, often double-layered for extra protection.
- Full-face respirators with the correct chemical cartridges to protect against breathing in nasty particles and chemical fumes.
- Disposable shoe covers to prevent anyone from tracking contamination outside the work area.
The Wash, Scrub, Rinse Cycle: Chemical and Mechanical Action
The actual cleaning work is methodical, repetitive, and frankly, gruelling. It's a constant cycle of washing, scrubbing, and rinsing, all designed to systematically strip away every last trace of contamination.
Professionals in this field use a range of specialised, high-pH cleaning agents. These are a world away from what you'd find at the supermarket; they're industrial-strength formulas created specifically to break down and lift the stubborn, oily residue left by meth.
The process generally follows a set pattern:
- HEPA Vacuuming First: Before any liquids are used, every single surface is meticulously vacuumed with a HEPA-filtered vacuum. This crucial first pass removes loose contaminated dust and stops it from getting kicked up into the air once cleaning begins.
- Apply and Dwell: The cleaning solution is applied and then left to sit for a specific "dwell time." This gives the chemicals a chance to work their magic, penetrating and starting to break down the residue.
- Mechanical Agitation: This is the scrubbing part. Technicians get in there with brushes and cloths and physically agitate every square centimetre of the surface to dislodge the grime.
- Rinse Thoroughly: The surfaces are then rinsed with clean water to wash away both the cleaning agent and the contaminants it has lifted.
- Do It All Again: This entire wash-scrub-rinse cycle is often repeated multiple times to get the surface to a testable, clean standard.
In tricky situations where contamination has soaked deep into porous surfaces like concrete or sealed timber, you might need to look at other options. While not as common, understanding the encapsulation method for methamphetamine remediation can offer a solution for these particularly stubborn scenarios.
Handling and Disposing of Contaminated Waste
Everything that comes out of that property—from the old carpet and office chairs to the used PPE and cleaning rags—is classified as hazardous waste. You can't just toss it in a skip bin out the front.
Every single item has to be carefully double-bagged in thick, clearly labelled plastic bags and sealed shut while still inside the containment zone. This waste must then be transported and disposed of by a licensed hazardous waste contractor, following all local environmental protection regulations. Knowing how to properly dispose of old lab equipment or other contaminated materials is a vital part of the plan and ensures you’re not creating another problem elsewhere. Keeping meticulous records of this disposal process is essential and will form a critical part of your final project completion report.
Verifying Success With Clearance Testing
The cleaning is done, the waste has been removed, and the site looks spotless. But the job isn't finished yet. The most critical step in any remediation project is the final verification—the independent proof that the cleanup has actually worked. This is where clearance testing comes in, providing the documented assurance that your workplace is genuinely safe and compliant with Australian methamphetamine decontamination guidelines.
This final sampling stage isn't just a box-ticking exercise; it’s a crucial checkpoint that protects your business from future liability. It provides objective, scientific evidence that residue levels have been successfully brought below the nationally recognised health investigation level.
The Importance of Independent Verification
After the remediation team has packed up and left, post-remediation sampling must be carried out by a completely independent third party, almost always a qualified occupational hygienist. This separation is vital to avoid any conflict of interest. The company that does the cleaning should never be the one that signs off on its own work.
This independence ensures the results are impartial and trustworthy, which is a fundamental principle of good practice. It provides an essential layer of assurance for property owners, insurers, and regulatory bodies alike. The process itself should mirror the initial detailed assessment, with the hygienist targeting the same areas previously identified as contaminated hotspots to confirm they are now clean.
What Is the Clearance Threshold in Australia?
The entire remediation effort is geared towards meeting one specific target. In Australia, the methamphetamine contamination investigation level for surfaces is a strict 0.5 µg per 100 cm², as outlined in key national and state-based guidance. This threshold is the definitive pass-or-fail mark for remediation in both residential and commercial properties. You can learn more about the research behind these exposure limits and how they are applied.
This strict limit is based on a risk-based approach designed to protect occupants from the health risks associated with third-hand exposure.
The three-step decontamination process that comes before this final testing phase is illustrated below.
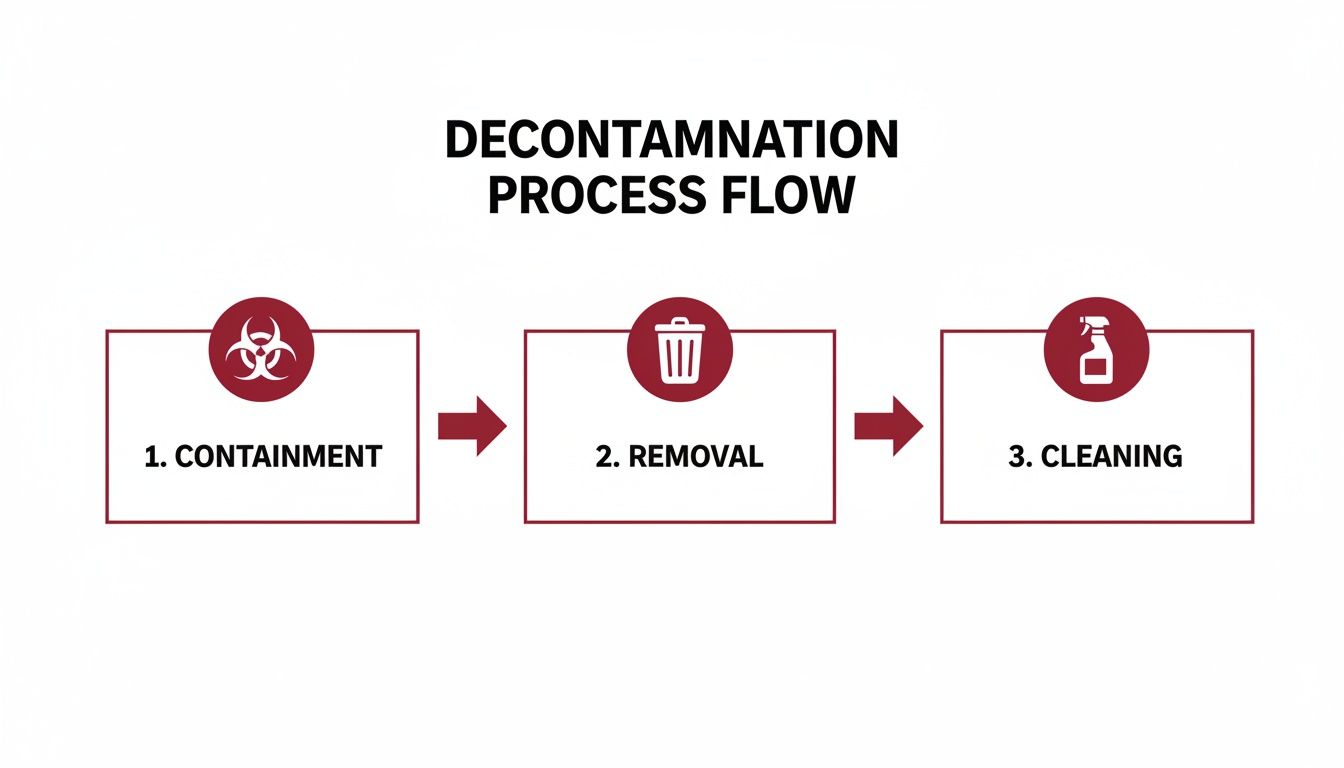
As you can see, containment, removal, and cleaning are the foundational actions required before any successful clearance testing can even begin.
Dealing With a Failed Clearance Test
So, what happens if a clearance test fails? It’s not the end of the world, but it does mean more work is needed. A failed test simply indicates that the initial cleaning wasn't entirely effective in one or more areas.
When this happens, the process looks like this:
- Review the Data: The hygienist will analyse the lab results to pinpoint exactly which areas failed and by how much.
- Targeted Re-Cleaning: The remediation team must return to the site and re-clean the specific zones that still show unacceptable residue levels.
- Further Re-Testing: Once the re-cleaning is complete, the independent hygienist will come back to take new samples from the affected areas.
This cycle continues until every single sample location passes, with results coming in below the 0.5 µg/100 cm² guideline. While it can be frustrating, a failed test is actually a sign that the quality control process is working as it should—catching any remaining contamination before the site is reoccupied.
The ultimate goal of post-remediation verification is to obtain a Clearance Certificate. This document is your official proof that the property has been decontaminated according to Australian guidelines and is safe for re-entry. It is a vital piece of documentation for legal, insurance, and compliance purposes.
The Significance of the Clearance Certificate
Once all post-remediation samples have been analysed and confirmed to be below the action level, the occupational hygienist will issue a formal Clearance Certificate or Validation Report. This document is your golden ticket, the final piece of the puzzle.
It summarises the entire project, including:
- Initial contamination levels.
- The remediation methods used.
- Final, post-remediation laboratory results for each sample.
- A conclusive statement that the property is fit for reoccupation.
Holding this certificate provides complete peace of mind. It demonstrates that you've fulfilled your duty of care, protects you from potential legal challenges, and serves as essential proof for insurance claims and regulatory audits. It is the definitive conclusion to a challenging process, formally closing the loop and confirming your workplace is safe for everyone.
Common Questions We Hear About Meth Decontamination
When you're dealing with potential meth contamination, it's natural to have a lot of questions. It's a complex issue, and the stakes are high. To help clear things up, here are some straightforward answers to the questions we get asked most often by business owners and facility managers.
Can I Just Clean It Up Myself?
I get why people ask this—it seems like a faster, cheaper solution. But attempting a DIY cleanup is a really bad idea. It's not just ineffective; it's genuinely dangerous.
Methamphetamine residue isn't like regular dirt. It's a toxic, invisible chemical that sticks to everything and requires specialised, high-pH cleaning agents to break it down. You also need commercial-grade equipment like HEPA-filtered vacuums and negative air units to stop the contamination from spreading through the air.
Without the right training and professional-grade Personal Protective Equipment (PPE), you're putting yourself at risk of serious chemical exposure. Worse, you can accidentally make the problem bigger by cross-contaminating clean areas. The only way to guarantee a site is safe and meets Australian guidelines is to bring in certified professionals.
How Long Is This Going To Take?
The honest answer is: it depends. The timeline for a full remediation project can vary quite a bit based on a few key factors.
- The Level of Contamination: Cleaning up light residue from casual drug use is a much faster job than tackling the heavy, widespread contamination left behind by a manufacturing operation.
- The Size and Layout of the Property: A small, single-room office is obviously quicker than a large industrial warehouse or a multi-unit accommodation block with complex ventilation systems.
- The Types of Materials Involved: It’s relatively straightforward to decontaminate hard, non-porous surfaces like stainless steel. It's a whole different story when you're dealing with porous materials like unsealed concrete, drywall, or timber, which often have to be completely removed and replaced.
A straightforward job might only take a couple of days from start to finish. However, a major project could easily stretch into several weeks, especially when you factor in the initial site assessment, the physical cleanup, and the crucial post-remediation verification testing.
Can't I Just Tell By Looking At The Place?
Absolutely not. Relying on your eyes is a surefire way to get a false sense of security.
Sure, a former clandestine lab might have some tell-tale signs—think yellow or brown stains streaking down the walls, a lingering chemical smell, or piles of discarded equipment. But the residue from meth smoking is completely invisible and has no odour.
A workplace can look spotless but still be riddled with hazardous levels of contamination. The only way to know for certain if a property is safe and complies with the methamphetamine decontamination guidelines is through professional surface testing analysed by an accredited lab.
The invisible nature of meth residue is what makes it so insidious in a workplace. People can be exposed for months without anyone realising it, which is why a proactive, science-based approach is critical whenever there's even a slight suspicion of drug use.
What Are The Real Health Risks From Third-Hand Exposure?
Third-hand exposure is what happens when someone comes into contact with the meth residue left behind on surfaces—long after the drug was actually used. This can happen through touching a contaminated desk, inhaling microscopic particles, or ingesting them.
Even at low levels, this kind of chronic exposure can cause some significant health issues, which is exactly why Australia's remediation standards are so strict.
Some of the reported symptoms include:
- Breathing problems, like coughing and asthma-like symptoms.
- Unexplained skin rashes and persistent eye irritation.
- Headaches, nausea, and dizziness.
- Behavioural changes—this is a particular concern for children, who are far more vulnerable due to their smaller size and tendency to put their hands in their mouths.
Researchers are still studying the full extent of the long-term health risks. This uncertainty is precisely why the Australian guidelines take a "precautionary principle" approach, setting the acceptable clearance level extremely low to protect everyone's health.
Navigating these challenges demands real expertise and an unwavering commitment to safety. At Anitech, we provide comprehensive occupational hygiene services to ensure your workplace is safe, compliant, and free from hazardous contaminants. Protect your team and your business by partnering with Australia's trusted experts. Contact Anitech today for a confidential consultation.


