
Quick Summary: Conducting a preliminary methamphetamine site assessment is a critical first step to identify potential contamination. This process involves a visual property inspection for signs like chemical stains and unusual rubbish, followed by strategic surface sampling. Results are compared against Australian guidelines to determine if professional remediation is required, ensuring occupant safety and legal compliance.
So, you suspect a property might be contaminated with methamphetamine. What's the first move? It all starts with a preliminary methamphetamine site assessment. This isn't about jumping straight into a full-blown cleanup; it's the critical first step to figure out if there's even a problem to begin with.
This initial look involves a trained eye, targeted sampling, and a solid risk evaluation to see if hazardous chemical residues from meth use or a clandestine lab are present. Think of it as the diagnostic phase. We're gathering the essential data needed to make smart, safe, and legally compliant decisions on how to conduct a preliminary methamphetamine site assessment.
This guide is for anyone in property management, construction, or manufacturing who needs to navigate the complexities of meth contamination within the Australian context. We'll cover how to spot the risks—from former labs to severe third-hand smoke—and why those invisible residues are a genuine health hazard for anyone stepping foot on site.
What is a Preliminary Methamphetamine Site Assessment?
A preliminary assessment is a focused investigation designed to answer one crucial question: Are there hazardous levels of methamphetamine residue here? It's fundamentally different from a detailed site investigation or a full decontamination, which only happen if this initial check comes back positive.
This is far more than a quick walkthrough. It's a combination of an experienced occupational hygienist's visual inspection and precise, scientific testing. For property managers, construction firms, and industrial site operators, this step is non-negotiable for ensuring a safe environment. It's a cornerstone of proactive site management, pinpointing risks before they become major liabilities.
Before diving deeper, it's helpful to clearly define what we're trying to achieve with this initial assessment. The table below summarises the key goals and why they matter.
Key Objectives of a Preliminary Assessment
| Objective | Description | Importance for Your Business |
|---|---|---|
| Identify Presence of Contamination | To confirm or rule out the presence of methamphetamine residues above Australian guideline values. | Provides a definitive yes/no answer, removing guesswork and enabling evidence-based decisions. |
| Determine Contamination Levels | To quantify the concentration of residues on surfaces in key areas of the property. | The level of contamination directly influences the scope and cost of any required remediation. |
| Assess Immediate Risk | To evaluate the potential health risks to current or future occupants, workers, or visitors. | Fulfills your duty of care by identifying immediate hazards that may require access restrictions. |
| Inform Next Steps | To provide clear, data-driven recommendations for further action, if any is needed. | Prevents unnecessary spending on remediation if the site is clear and guides efficient cleanup if it's not. |
Ultimately, each objective feeds into a clear, defensible report that protects your business and the people who interact with your property.
Why This First Step Is So Crucial
Turning a blind eye to potential meth contamination is a recipe for disaster, opening you up to serious health risks and significant legal trouble. Third-hand exposure—simply touching surfaces where meth residue has settled—can lead to nasty health issues like respiratory problems, skin irritation, and even neurological symptoms.
For a business, the fallout can be just as damaging. Here’s why a preliminary assessment is your non-negotiable first move:
- Protecting People: First and foremost, it uncovers hidden dangers that could harm anyone on the property, whether it's your maintenance crew or a family about to move in.
- Staying Compliant: Australian states have clear guidelines. An assessment demonstrates due diligence, helping you sidestep hefty fines and legal battles.
- Making Smart Financial Decisions: The results dictate what comes next. A clean report means you're good to go. A positive result allows you to accurately budget for remediation, taking the guesswork out of the equation.
A preliminary methamphetamine site assessment is your first line of defence. It provides objective, scientific data to transform uncertainty into a clear, actionable plan, protecting both people and investments from unseen hazards.
This initial evaluation truly sets the course for everything that follows. It provides the factual foundation needed before you commit to more extensive—and expensive—actions. Without it, you’re flying blind.
Preparing for a Safe and Effective On-Site Inspection
Before you even think about setting foot on a potentially contaminated property, your preparation is what separates a professional assessment from a dangerous one. Simply showing up unprepared doesn't just put the integrity of your findings at risk; it's a direct threat to your team's health. It's all about moving from the theoretical to the practical.
This process always starts with a solid desktop review. Get your hands on all the property history you can find, pore over any disclosure statements, and build a picture of the site's unique context. An inner-city apartment has entirely different risk factors compared to a remote industrial shed. Part of this initial homework also involves understanding New Zealand's workplace safety procedures and legal duties, as their core principles often align with Australian WHS standards.
Assembling the Right Personal Protective Equipment
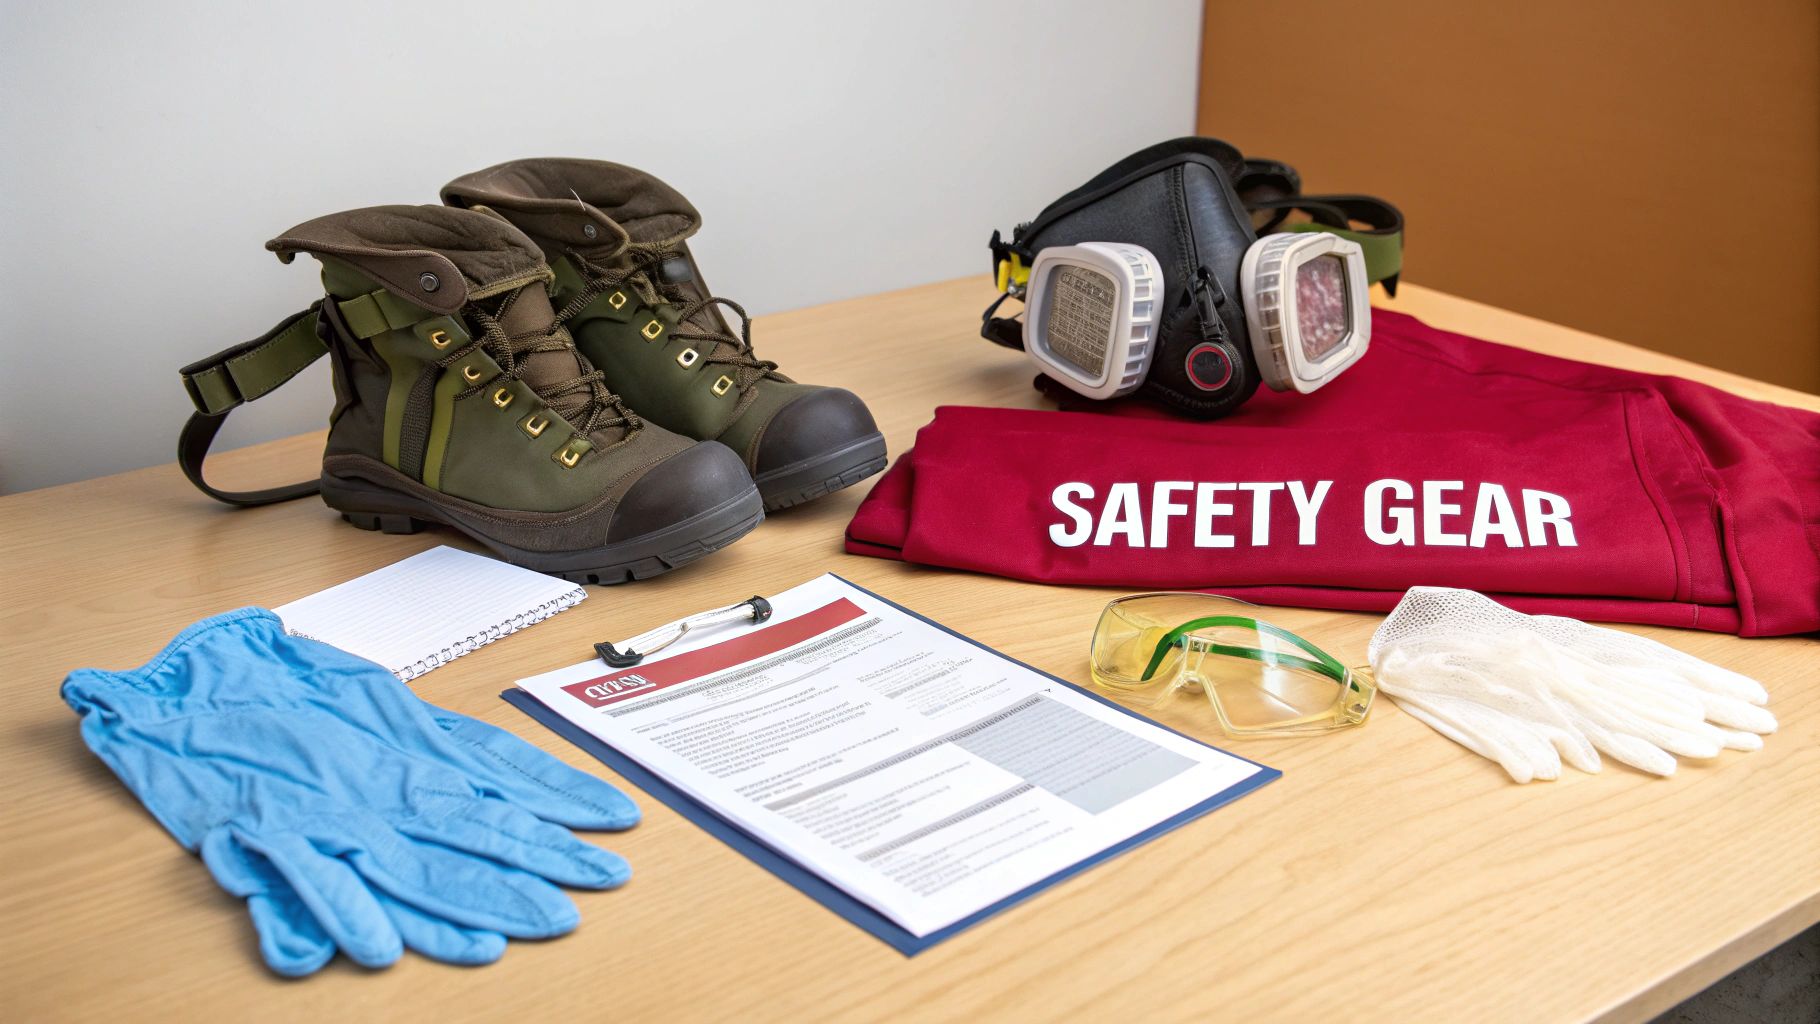
Your Personal Protective Equipment (PPE) is your non-negotiable first line of defence against unseen hazards. Choosing the right gear isn't a one-size-fits-all deal—it’s about carefully matching the equipment to the potential risk level you're walking into.
Your essential PPE kit must always contain:
- Respiratory Protection: At a bare minimum, you'll need a half-face or full-face respirator fitted with P2/P3 particulate filters. If you’re heading into a site with suspected heavy contamination or poor airflow, a powered air-purifying respirator (PAPR) is the much safer option.
- Hand Protection: Nitrile gloves are essential. They give you a reliable chemical barrier but still allow the dexterity you need to handle sampling kits and tools.
- Body Coverage: Think disposable coveralls. A Tyvek suit with an integrated hood and booties is standard practice to stop contaminants from getting onto your skin or clothes.
- Eye Protection: Safety glasses or goggles are a must to shield your eyes from accidental splashes or any airborne particles.
Remember, even the best gear is useless if not used correctly. This means proper fit-testing for respirators and, just as importantly, following strict doffing (removal) protocols to prevent cross-contamination when you’re done.
Establishing Robust On-Site Safety Protocols
With the right gear sorted, your next focus is creating a controlled and safe work environment. This goes way beyond just wearing a mask; it's about having a structured plan for managing the site from the moment you arrive until you drive away.
A crucial part of this is using data to profile risk before you get there. For example, wastewater analysis from the National Wastewater Drug Monitoring Program can give you invaluable context, especially for industrial sites. Data from December 2019 showed some parts of New South Wales had an estimated consumption of 3,500 mg/1000 people/day. This kind of information helps us occupational hygienists prioritise assessments in high-risk zones.
Your on-site safety plan isn't a static checklist. It's a living document that needs to be clearly briefed to the entire team before entry and must be flexible enough to adapt if you uncover unexpected hazards.
Before anyone goes in, the first thing you do is establish clear safety zones. This is a fundamental practice borrowed from hazmat response, and it's absolutely critical for containing contamination.
Defining Your Work Zones
Setting up distinct zones on-site is a simple but incredibly effective way to keep contaminants where they belong and ensure your team stays safe.
- Exclusion Zone (Hot Zone): This is the heart of the operation—the area with known or suspected contamination where the assessment happens. No one enters without full PPE. Period.
- Contamination Reduction Zone (Warm Zone): Think of this as the airlock. It's a buffer area where you decontaminate yourself and your equipment before heading back to the clean zone.
- Support Zone (Cold Zone): This is your safe haven, completely free from contamination. It's where the team can take a break, and where all paperwork and administrative tasks happen.
On top of zoning, always make sure the site is well-ventilated before and during your work, if it's safe to do so. Have a decontamination plan ready not just for your people but for every single piece of equipment you take in. Every camera, sampling kit, and tool has to be meticulously cleaned or properly disposed of before it leaves that warm zone. This is the kind of detail that turns a risky job into a professional, controlled assessment.
The Site Walkthrough: A Visual and Physical Property Inspection
Once you're kitted out in your PPE and safety protocols are locked in, it's time to get to the heart of the on-site work: the walkthrough. This is where your training really kicks in. It’s a methodical, forensic process of moving through the property to spot and document any red flags pointing to meth use or, more seriously, a former clandestine lab.
Think of it less as a simple inspection and more as an investigation. You're piecing together a story from the clues left behind, many of which are subtle and easily missed by an untrained eye. We'll start from the outside and work our way in.
Starting with the Exterior Assessment
Your assessment begins the moment you arrive, well before you set foot inside. The outside of a property can tell you a lot if you know what you’re looking for. A thorough walk of the entire perimeter is your first order of business. You're hunting for anything that seems out of place, whether it’s a suburban backyard or the back lot of an industrial unit.
Keep an eye out for these classic exterior indicators:
- Stained Soil or Concrete: Look for strange discolouration on the ground, especially near drains, downpipes, or tucked away in corners. Chemical waste gets dumped quickly, and it almost always leaves a mark.
- Patches of Dead Vegetation: If you see dead, scorched-looking patches of grass or plants for no apparent reason, it’s a big red flag. The toxic cocktails used in meth production are potent herbicides.
- Suspicious Rubbish: Pay close attention to the bins or any discarded junk. A suspicious amount of empty pseudoephedrine blister packs, lithium battery casings, solvent tins (like acetone or toluene), or gas cylinders with rusted-out valves is a major concern. This stuff is often hastily buried or tossed into overgrown parts of the yard.
- Unusual Security: While not a smoking gun on its own, take note of over-the-top security. Think blacked-out windows, an excessive number of CCTV cameras (especially those pointing away from the property), and makeshift barricades.
A quick tip from the field: Your camera is your best friend here. A high-res photo of a chemical stain on the driveway tells a much clearer story than a note in your logbook. Meticulous documentation is everything.
Context is crucial. In an industrial area, you might find chemical drums stashed behind a dumpster. In a residential home, you might stumble upon a burn pile in the backyard full of melted plastic and empty chemical containers. It's all about interpreting the signs within the specific environment.
Moving Inside for the Interior Inspection
After you've thoroughly documented the exterior, it’s time to move inside. This is where the evidence of contamination often becomes much more obvious and concentrated. It is absolutely critical to work through the property systematically—room by room—so nothing gets missed. Pay special attention to areas with good ventilation, a water source, and a bit of privacy. These are the hotspots for a meth cook.
Kitchens, laundries, bathrooms, sheds, and garages are always high on my priority list. The chemical processes involved in making meth leave behind very distinct physical calling cards.
An Interior Inspection Checklist
As you move through the interior, use all your senses. Your eyes and nose will be your most valuable tools. Here’s a breakdown of what to look for:
- Strange Chemical Smells: Trust your nose. A strong, pungent odour is a dead giveaway. Meth labs often have a smell like cat urine (from ammonia), a sharp vinegar-like scent (acetic acid), or other harsh solvent smells.
- Surface Staining: Scan the walls, floors, ceilings, and benchtops for distinctive stains. You're looking for reddish-brown or yellowish stains, which are classic signs of iodine or phosphorus use. These often pop up near power points or on benchtops.
- Modified Plumbing: Check sinks, toilets, and drains for corrosion or weird, makeshift plumbing. Chemical waste is often poured straight down the drain, which wreaks havoc on pipes and fixtures.
- Burn Marks: Note any scorch or burn marks on carpets, benches, or other surfaces. The process involves volatile chemicals and heat, so small fires and scorch marks are common.
- Covered Smoke Detectors: This one is simple but speaks volumes. If the smoke detectors have been disabled or covered with plastic, it’s a huge red flag. They're often covered to stop the chemical fumes from setting them off during a cook.
- Surface Residue: Sometimes you might see a fine, powdery residue on horizontal surfaces. More often, you'll feel it—a sticky or slightly oily film on windows, mirrors, or benchtops is a tell-tale sign of aerosolised meth residue that has settled out of the air.
Don't Forget the Ventilation System
The heating, ventilation, and air conditioning (HVAC) system is a superhighway for contamination. It sucks in contaminated air and spreads it through every room in the house, coating the inside of the ductwork with meth residue.
When you're checking the HVAC:
- Pull out the return air filter. See if it's stained with a yellowish or reddish-brown tinge.
- Look inside the return air plenum. You might see visible staining or residue on the interior surfaces.
- Note any strange smells coming from the vents when you turn the system on.
Your documentation throughout this process needs to be flawless. Use a site map to pinpoint where you found each piece of evidence, and take clear, well-lit photos from a few different angles. Your notes should be objective and detailed, describing exactly what you see and smell. This record is the foundation for your report and will guide every action that follows.
Strategic Surface and Air Sampling Techniques
A sharp eye during the visual inspection can tell you a lot, but it’s the sampling that provides the hard evidence. This is where we move from observation to science, collecting the physical samples needed to confirm or deny the presence of methamphetamine contamination.
This isn't about just swabbing a few random spots. It’s a calculated process, focusing on the areas where residue is most likely to be hiding. Your sampling strategy has to be logical and defensible, grounded in established methods so the lab results are accurate and can stand up to scrutiny.
Selecting Strategic Sampling Locations
The real skill in effective sampling is knowing exactly where to look. Meth residue doesn't spread evenly; it settles on surfaces, seeps into porous materials, and gets circulated by ventilation systems. Your job is to target these high-probability zones.
I always start with the non-porous, high-contact surfaces. These are your best bet for finding reliable indicators of contamination from either direct touch or airborne deposits.
Think about places like benchtops, tables, and windowsills where airborne particles naturally settle. Don't forget the high-touch points – doorknobs, light switches, and appliance handles are classic collection spots.
One of the most critical areas, and one that’s often overlooked, is the ventilation system. HVAC return air vents and their filters are goldmines for information. They actively pull in and trap airborne contaminants, effectively giving you a concentrated history of the property's air quality.
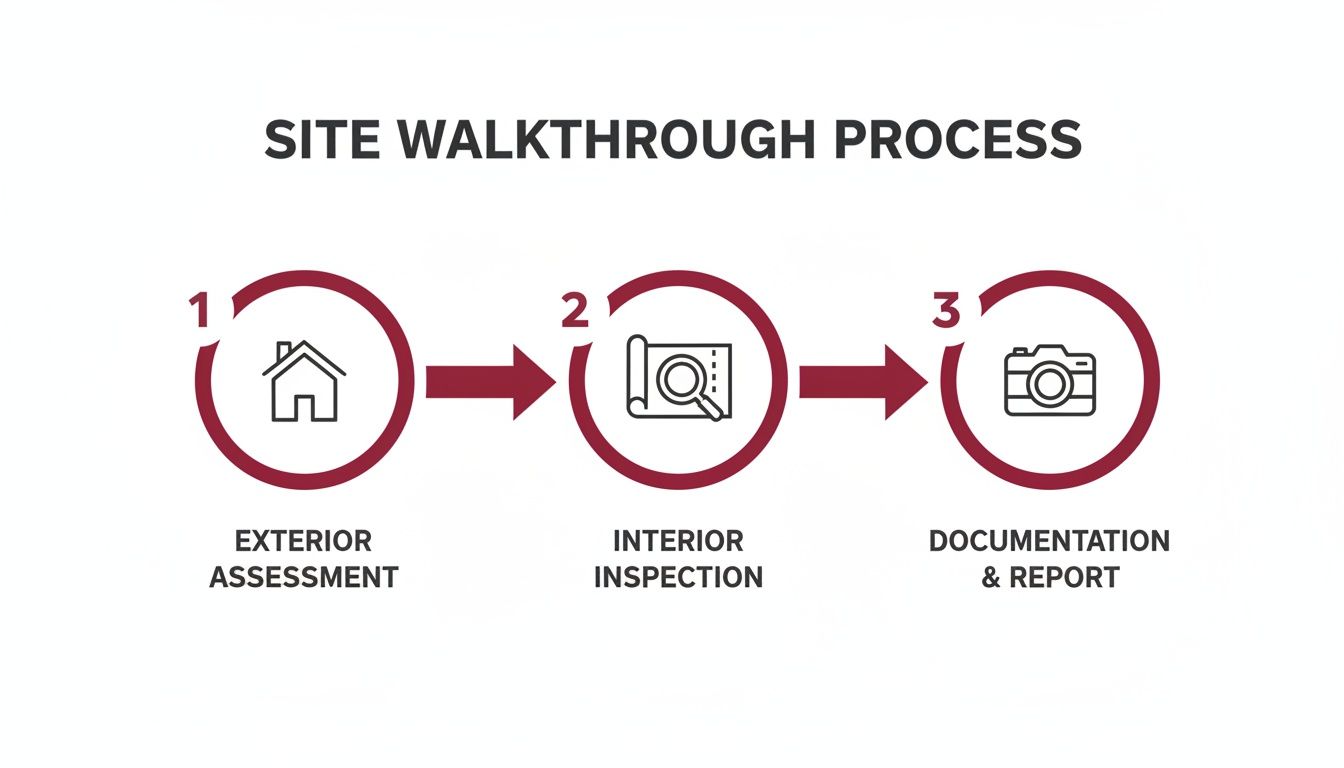
This systematic approach, informed by your initial walkthrough, ensures every sample you take is purposeful.
Surface Sampling Priority Areas
To get the most representative results, you need to prioritise your sampling locations based on where contamination is most likely to accumulate and persist. The table below outlines some of the most critical areas I focus on during a preliminary assessment.
| Surface Type | Example Locations | Reason for Prioritisation |
|---|---|---|
| Non-Porous Horizontal | Kitchen benchtops, tables, windowsills, tops of wardrobes | These are primary settling zones for airborne methamphetamine particles from smoking or cooking. |
| High-Touch Points | Light switches, doorknobs, remote controls, cupboard handles | Residue easily transfers from hands to these surfaces, indicating user activity. |
| Ventilation Systems | HVAC return air vents, exhaust fan grilles, air conditioner filters | These act as concentrators, actively drawing in and trapping airborne contaminants over time. |
| Absorbent Materials | Unsealed concrete, carpets, curtains, unpainted plasterboard | Shows the extent of absorption into the building's fabric, which is crucial for remediation planning. |
| Plumbing Fixtures | S-bends under sinks, drains, toilet bowls | These areas can trap residues from the disposal of chemicals or contaminated liquids. |
Focusing on these key areas gives you a comprehensive picture of the contamination profile, moving beyond just surface-level readings to understand the full scope of the problem.
Mastering Wipe Sampling Techniques
Once you’ve picked your spots, the collection method itself has to be precise. The industry standard here is the NIOSH 9111 method. It's a validated procedure for surface wipe sampling, and following it to the letter is non-negotiable if you want reliable, defensible lab results.
The process is straightforward but demands care.
- First, you’ll define a 10 cm x 10 cm (100 cm²) area using a disposable template.
- Next, take a sterile gauze pad lightly moistened with a reagent-grade solvent (I typically use methanol or isopropanol) and wipe the entire area.
- Start by wiping side-to-side, applying firm, even pressure and slightly overlapping each stroke.
- Fold the gauze so the used side is facing in.
- Wipe the exact same area again, this time from top to bottom.
- Finally, carefully place the folded gauze into a sealed, labelled vial for transport to the lab.
This S-pattern wipe technique is designed to collect as much residue as possible from that specific 100 cm² area, which is crucial for getting an accurate concentration reading.
Discrete vs. Composite Sampling: What to Choose
Your sampling plan will come down to two main approaches: discrete or composite sampling. Knowing when to use each one is key to an efficient and cost-effective assessment.
Discrete sampling is straightforward: one sample from one specific location. This is the go-to method when you need to pinpoint contamination hotspots. For example, if you spotted a suspicious stain on a benchtop during the visual inspection, you’d take a discrete sample right there.
Composite sampling, on the other hand, is about efficiency. Here, you combine several wipes from different locations within a single room into one sample vial. It’s a cost-effective way to get an "average" contamination level for a larger area, making it perfect for an initial screening.
A common field practice is to take up to four wipes from different surfaces in a room—say, a wall, a door, a vent, and a light switch—and combine them as one composite sample. If that sample comes back over the guideline value, you know the room needs a closer look with discrete samples.
This isn't guesswork; it’s guided by strict regulations. In Australia, our assessments are benchmarked against national guidelines. Data from former clan labs shows that about 50% of tested sites had contamination up to 10 µg/100 cm². The other half? Their levels soared as high as 4000 µg/100 cm². These numbers really drive home why systematic, evidence-based sampling is so critical. For a deeper dive, you can explore more data on Australian site contamination.
Ultimately, your choice between discrete and composite sampling will hinge on what you’re trying to achieve—a broad-strokes screening or a highly targeted investigation.
Making Sense of the Lab Report and Deciding What's Next
The waiting is over. You've got the lab report in hand, and this is where the rubber really hits the road—where your on-site suspicions are confirmed or dismissed by hard science. Making sense of this data is the most critical part of the preliminary assessment, as it dictates every single move you make from this point forward.
The report will show its findings as micrograms per 100 square centimetres, or µg/100 cm². This is simply a measure of how much meth residue was found in the surface area you sampled. Your first job is to benchmark these numbers against the official Australian guidelines.
What the Numbers Mean: The Australian Guideline
For any residential property, the magic number you need to burn into your brain is 0.5 µg/100 cm². This isn't just a number plucked from thin air; it’s the health-based investigation level laid out in the national Clandestine Drug Laboratory Remediation Guidelines. If any of your samples hit or exceed this mark, you're dealing with contamination that needs professional remediation. Simple as that.
While commercial properties might have different considerations, this 0.5 µg/100 cm² level is still the gold standard for deeming a place safe for people to be in. At this preliminary stage, it’s a black-and-white situation: the sample is either above the guideline, or it’s below it.
A word of advice: don't just see these results as a simple pass or fail. They tell a story. A high reading from a composite sample taken across multiple rooms hints at widespread contamination. On the other hand, a single high reading from one discrete sample can help you pinpoint a specific hotspot of activity.
This clear-cut comparison is what guides you down one of two very different paths.
Path One: The All-Clear
Getting a report where every sample comes back well under the 0.5 µg/100 cm² threshold is the outcome everyone hopes for. It means your preliminary assessment has found no evidence of hazardous meth contamination. But your job isn't quite done yet.
Proper documentation is absolutely crucial to wrap up the project and show you've done your due diligence. Here’s what you need to do:
- Finalise Your Assessment Report: Pull together all your notes—the visual inspection checklist, site diagrams showing exactly where you took each sample, and of course, the official laboratory certificate of analysis.
- Issue a Clearance Statement: Based on the results, you can now issue a formal statement confirming that at the time you assessed it, the property was below the guideline levels for methamphetamine.
- Archive Everything Securely: Keep a complete file of the entire assessment. This paperwork is invaluable for future property sales, insurance claims, and provides a solid layer of legal protection.
Once that's all squared away, you can confidently give the site the all-clear and close out the job.
Path Two: Contamination Confirmed
Now, if even one of your samples comes back at or above 0.5 µg/100 cm², the game changes instantly. The property is officially contaminated. Your focus has to pivot immediately from investigation to risk mitigation. Your preliminary assessment has successfully done its job—it's identified a health hazard.
What you do next is critical for keeping people safe and staying compliant.
Immediate Steps for Risk Mitigation
As soon as contamination is confirmed, you need to act fast.
- Lock Down the Site: The first priority is to prevent anyone from entering the property without authorisation. This could mean changing the locks and posting clear, unmissable warning signs at every entrance, stating there's a potential health hazard inside. From this point on, only people with the right training and PPE should go in.
- Notify Everyone: You have a duty of care to inform all stakeholders. This means the property owner, the property manager, any tenants, and potentially your state's WorkSafe authority. In these situations, total transparency is your best friend for managing liability.
- Bring in the Specialists: This is the most important step. A preliminary assessment identifies the problem; it doesn't equip you to fix it. Meth decontamination is a highly specialised field. It requires experts who understand complex chemical processes, hazardous waste disposal, and how to conduct post-remediation verification testing. Your role now is to hand over the project to a qualified and experienced remediation company.
Trying to handle the cleanup yourself is a massive mistake. It's not just incredibly dangerous; a "DIY" approach can actually spread the contamination further and land you in a world of legal and financial trouble. The data you’ve gathered is the vital first chapter, giving the remediation specialists the baseline info they need to create a safe and effective plan to make the property safe again.
Answering Your Questions About Meth Site Assessments
When you're faced with the possibility of meth contamination, a lot of questions pop up straight away. It's completely normal. From costs and timelines to legal duties and health risks, getting clear, straightforward answers is the first step to making a sound decision. Here’s a rundown of the most common queries we get from property managers, industrial site operators, and construction firms across Australia.
What’s the ballpark cost for a preliminary assessment?
This is usually the first question, and the honest answer is: it depends. The cost can shift quite a bit based on the property's size, its location, and how many samples we need to take to get a clear picture. For a small residential house, you might be looking at a starting figure of a few hundred dollars, but this will naturally scale up for a larger, more complex industrial site.
A few things will influence the final number on the quote:
- Property Size: A bigger footprint simply takes more time and often requires more samples to cover all the key areas.
- Sampling Strategy: We’ll decide between discrete (individual) and composite (combined) sampling. This choice directly affects the lab analysis costs.
- Location & Access: If the site is out in the sticks or tricky to get into, we have to factor in extra travel and logistical costs.
- Urgency: Need the lab results yesterday? Express turnaround is available, but it usually comes with a priority processing fee from the lab.
It’s best to think of this as an investment in safety and certainty. The upfront cost of an assessment pales in comparison to the potential fallout from undiscovered contamination—we’re talking expensive remediation, legal headaches, and serious health risks.
How long does the whole process take?
From our first chat on the phone to you holding the final report, a standard preliminary assessment is usually wrapped up within 3 to 7 business days. The biggest variable here is how busy the laboratory is at the time.
The on-site work is the quickest part; we're typically in and out in just a few hours. The real waiting game is the lab analysis, as we need them to process the samples and issue the certified results before we can finalise our report.
What are my legal duties if contamination is found?
This is where things get serious. If the assessment confirms meth residue above the Australian guideline of 0.5 µg/100 cm², your legal responsibilities under Work Health and Safety (WHS) legislation kick in immediately. You have a clear duty of care.
This isn’t something you can ignore. You must:
- Restrict access to the contaminated area straight away. No one goes in.
- Inform everyone. This includes property owners, tenants, employees—anyone with a vested interest needs to be told about the hazard.
- Call in the specialists. You'll need to engage a professional remediation company to decontaminate the property according to national guidelines.
Dropping the ball on this can lead to hefty fines and legal action. It's absolutely critical to follow a documented process to manage the risk and prove you've done the right thing.
Trying to figure out a meth contamination issue requires a steady, expert hand. Our team of experienced occupational hygienists delivers thorough, no-nonsense assessments to make sure your property is safe and compliant. We give you clear, data-driven reports so you can move forward with confidence. If you need help protecting your workplace or investment, get in touch with us today. You can learn more about our services at https://occhygiene.com.au.


