
A grain dust assessment isn't just about checking for dust. It's a methodical process for measuring precisely how much dust is in the air your team is breathing and figuring out the real-world risks that come with it. This takes you beyond simply noticing a dusty environment and into the realm of quantifying worker exposure and pinpointing where combustible dust could fuel an explosion. It’s the bedrock of a safe, compliant operation.
Why a Grain Dust Assessment Is Non-Negotiable
It’s all too easy to get used to the hazy air in a grain handling facility and just write it off as part of the job. But that seemingly harmless dust is hiding some serious dangers that can have devastating outcomes. A proper grain dust assessment is much more than a compliance exercise; it’s a critical tool for protecting your people and your entire operation.
Think about a silo manager who starts noticing a few workers have developed nagging coughs that just won't go away during harvest season. That’s not a minor inconvenience—it's a massive red flag. Those fine particles floating in the air are a direct threat to lung health and a powerful fuel for a potential explosion.
The Hidden Health Hazards in Grain Dust
Grain dust isn't just dirt. It's an organic mix of tiny grain fragments, mould spores, bacteria, and even insect parts, which makes it a potent irritant and sensitiser. Breathing it in day after day can lead to a host of serious and sometimes permanent respiratory diseases.
- Farmer's Lung: This is an allergic reaction to mould spores found in the dust. It causes lung inflammation that can eventually lead to permanent scarring.
- Asthma: Grain dust is a well-documented trigger for occupational asthma, which can develop in workers even if they've never had asthma before.
- Chronic Bronchitis: The constant irritation from dust leads to a persistent cough and excess mucus, gradually damaging lung function over time.
These aren't rare conditions. National workplace surveys in Australia have shown that 39% of all workers are exposed to airborne hazards, and for 80% of those, the hazard is dust. In the grain industry, that means thousands of workers are regularly at risk. The problem is, routine monitoring has been historically limited, so the actual exposure levels are likely far higher than we realise.
The true purpose of a grain dust assessment is to make the invisible visible. It quantifies the unseen threat, allowing you to implement targeted controls before a minor issue becomes a life-altering health problem or a catastrophic safety failure.
The Explosive Potential of Airborne Dust
Beyond the health risks, the physical nature of grain dust creates a very real risk of explosion. When a cloud of fine dust particles is suspended in the air inside an enclosed space and finds an ignition source, the result can be incredibly violent. The five ingredients for a dust explosion—fuel (the dust), oxygen, dispersion (a dust cloud), confinement (an enclosed space), and an ignition source—are all commonly found in grain handling facilities.
To get a handle on these risks, facilities often turn to the field of occupational hygiene. Professionals in this area are trained to identify, evaluate, and control workplace hazards just like combustible dust.
An assessment is your roadmap to finding the danger zones. It helps you pinpoint exactly where explosive concentrations of dust can build up, like inside bucket elevators, at transfer points, or in storage bins. It also helps you spot potential ignition sources, from something as obvious as a welding spark to something less obvious like an overheated bearing or a static discharge.
Before we dive deeper, it's worth summarising the key dangers at a glance.
Key Risks of Uncontrolled Grain Dust Exposure
| Risk Category | Specific Hazard | Potential Outcome |
|---|---|---|
| Health Risks | Inhalation of organic dust, mould, and bacteria | Farmer's Lung, occupational asthma, chronic bronchitis, permanent lung damage |
| Safety Risks | Combustible dust accumulation | Catastrophic dust explosion, fire, structural collapse |
| Operational Risks | Equipment failure from dust buildup | Clogged filters, overheated motors, unplanned downtime, costly repairs |
| Compliance Risks | Non-adherence to WHS regulations | Fines, stop-work orders, legal liability, reputational damage |
By understanding these specific risks in your facility, you can shift from a reactive mindset to a proactive safety culture. This means putting in place smart engineering and administrative controls that neutralise the danger before it ever has a chance to escalate.
Laying the Groundwork for Your Assessment
A successful grain dust assessment doesn’t kick off the moment you switch on your monitoring gear. In my experience, the most important work happens long before you take a single sample. This initial stage is all about building a solid plan—a clear roadmap that ensures the data you collect is meaningful, accurate, and truly reflects the conditions your team faces day in and day out.
Think of it as a mix of desk research, a hands-on site investigation, and, most importantly, talking to the people on the floor. If you rush this part, you're essentially flying blind. You might end up with a page full of numbers, but you won't have the context to know what they actually mean for your workers' safety.
Understanding the Regulatory Benchmarks
First things first, you need to know what you’re measuring against. In Australia, your starting point is always the Workplace Exposure Standards (WES) published by SafeWork Australia. These aren't just recommendations; they are the legal and scientific benchmarks that define compliance.
For grain dust, the figure you really need to get your head around is the Time-Weighted Average (TWA). This isn't about a single peak reading. It’s the average exposure a worker can have over a standard eight-hour day, five days a week, without suffering ill health effects. Knowing the current TWA for inhalable grain dust is non-negotiable.
Key Takeaway: The Workplace Exposure Standard isn't just a guideline; it's the pass/fail line for your assessment. Knowing the exact TWA limit gives your data context and transforms raw numbers into actionable safety insights.
Once you have your lab results, this benchmark is what allows you to immediately tell if a work area or a specific role is within safe limits or needs urgent attention.
Conducting a Thorough Walkthrough
With the regulations fresh in your mind, it's time to get your boots on the ground. A detailed walkthrough of the facility is absolutely essential for spotting potential dust hotspots and getting a feel for how dust behaves in your specific environment. This is more than a casual stroll—it’s an investigation.
You're looking to pinpoint where dust generation is at its worst. From what I’ve seen, the usual suspects are:
- Transfer Points: Anywhere grain drops from one conveyor to another or into a bin.
- Enclosed Spaces: Silos, storage bins, and poorly ventilated tunnels where dust hangs in the air.
- Processing Areas: Near any milling, grinding, or bagging equipment.
- Receival Pits: That initial dumping point for trucks often creates massive, uncontrolled dust plumes.
As you walk, take plenty of notes and photos. Document where you see dust settling—on ledges, equipment, and floors. Check out the existing dust control measures like extraction fans or water misters and make a quick, initial judgement on how well they’re actually working.
Engaging Your Most Valuable Resource: The Workers
Safety manuals and documented procedures will tell you how a job should be done, but they rarely capture how it’s actually done. This is where your team becomes your greatest asset. Their on-the-ground experience provides insights you simply can't get from standing back and watching.
Chat with the operators, the maintenance crew, and the cleaners. Ask them about their daily tasks, which jobs kick up the most dust, and if they’ve noticed any patterns. Maybe dust is worse on dry, windy days or when you’re handling a particularly fine grain. These conversations often expose the small but crucial differences between theory and practice.
This is especially true during high-pressure periods like harvest when long hours can dramatically increase a person's total exposure. For example, a 2019 study in Western Australia found that 40% of farmers were exposed to inhalable grain dust concentrations above the standard limits during harvest. The risk was amplified because they were pulling 16-hour shifts, a reality that a standard assessment might completely miss without that direct worker feedback. You can read the full research about these harvest season findings to better understand the risks of those long shifts.
By pulling together regulatory knowledge, a physical site inspection, and firsthand accounts from your workers, you create a complete, three-dimensional picture. This holistic approach ensures your sampling strategy is targeted, efficient, and, most importantly, reflects the real risks in your workplace.
Choosing the Right Dust Monitoring Tools
Picking the right gear for a grain dust assessment is more than just a box-ticking exercise; it’s fundamental to getting data you can actually trust. Get it wrong, and you could end up with a false sense of security or, just as bad, spend a fortune on controls you don’t really need. The whole decision boils down to one simple question: are you trying to measure what a specific worker is breathing, or are you gauging the general dust levels in the air?
Your answer will point you toward either personal dust samplers or static area monitors. These tools are designed for very different jobs and aren't interchangeable. Getting a handle on understanding various air quality test kits can give you a solid foundation before you even start.
Personal Samplers: A Worker's-Eye View of Exposure
If you need to know exactly what an individual is inhaling, a personal sampler is your only real option. These are small, battery-operated pumps that a worker wears for their entire shift, or at least for the duration of a specific task. A tube connects the pump to a small filter cassette, which is clipped right onto their collar.
This placement is critical—it has to be in their "breathing zone". This isn't just a suggestion; it’s the only way to collect an air sample that truly represents what’s going into their lungs as they move, work, and go about their day.
Think about a worker tasked with cleaning out a grain silo. The dust levels inside that confined space can be incredibly high, but that intense exposure is very localised. A static monitor placed ten metres away on a wall would show a low reading, completely missing the real risk. A personal sampler, on the other hand, captures that peak exposure perfectly, giving you the hard data needed to protect that worker.
This infographic lays out the core differences between the two main types of equipment.
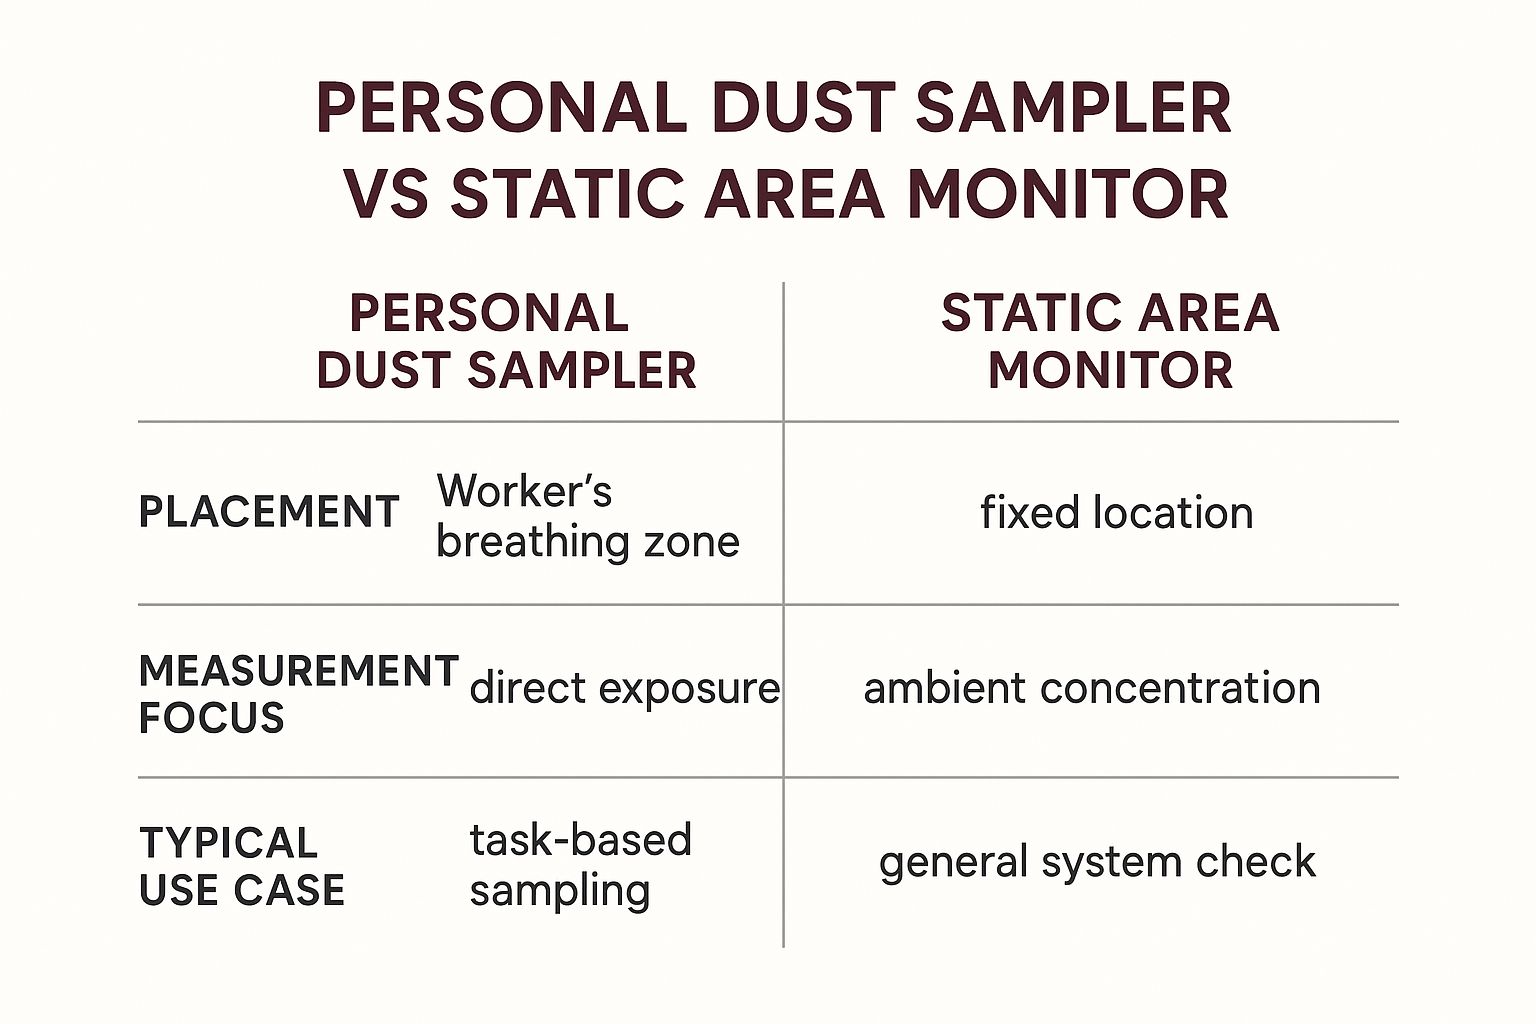
As you can see, your objective dictates the tool. Are you focused on an individual's direct risk, or are you checking how well your dust control systems are performing across the entire facility?
Static Monitors: Gauging the Bigger Picture
Static or area monitors are the opposite. You set them up in a fixed spot to get a feel for the ambient dust concentration in a particular area, like near a conveyor transfer point or in the middle of a bagging room.
What they don't tell you is what a specific person is breathing. An employee might only walk through that area a few times a day, so their personal exposure will be much lower than what the static monitor reads. What these monitors excel at is providing a steady, reliable baseline of dust levels in a defined space.
They are incredibly useful for verifying whether your engineering controls are actually working. Let’s say you’ve just installed a new dust extraction hood over a receival pit. By placing a static monitor nearby before you turn it on and then again after, you get concrete proof of its impact. If the dust concentration plummets by 70%, you know your investment paid off.
For more on getting this right, expert advice on inhalable dust monitoring can help ensure you’re deploying equipment effectively and interpreting the data correctly.
Expert Tip: Never rely solely on area monitors to assess individual worker risk. A worker moving through multiple zones will have a complex exposure profile that only a personal sampler can accurately capture.
Getting It Right in the Field: Critical Details for Accurate Sampling
Just having the right monitor isn't enough; how you use it is everything. A sloppy setup can make your entire grain dust assessment worthless. I've seen it happen.
Pay close attention to these three factors:
-
Calibration is Non-Negotiable: Every piece of equipment, from the pump to the flowmeter, must be calibrated before and after every single sample. It’s the only way to know for sure that the pump is drawing air at the precise volume needed for an accurate calculation. Without calibration, your data is just a guess.
-
Placement is Everything: We've covered the breathing zone for personal samplers. For static monitors, be deliberate. Place them at about head height for a typical worker and choose a location that’s genuinely representative of the area. Keep them away from open doors, windows, or fans that could throw off the readings.
-
Timing Your Sample: Don't just sample on a quiet Tuesday morning. Your goal is to capture a representative exposure. That might mean running a full-shift sample to calculate a Time-Weighted Average (TWA). Or, it could mean targeted, short-term sampling during a particularly dusty job—like loading a truck—to understand peak exposure risks.
Comparison of Dust Monitoring Equipment
To help you decide, here’s a straightforward breakdown of the two main types of monitoring equipment. Think about what you need to find out, and the right choice becomes much clearer.
| Equipment Type | Primary Use Case | Key Advantage | Consideration |
|---|---|---|---|
| Personal Sampler | Measuring a single worker's direct inhalable exposure | Provides the most accurate data for individual risk assessment | Requires worker cooperation and can be intrusive; data only represents the person wearing it. |
| Static/Area Monitor | Assessing general dust levels in a fixed location | Excellent for testing the effectiveness of control measures | Does not reflect an individual worker's exposure, as they move between different areas throughout their shift. |
Ultimately, a comprehensive assessment might even use both. You could use area monitors to identify general hotspots and then deploy personal samplers on the workers in those high-risk zones to get the full picture.
Getting Your Boots on the Ground: The On-Site Sampling Strategy
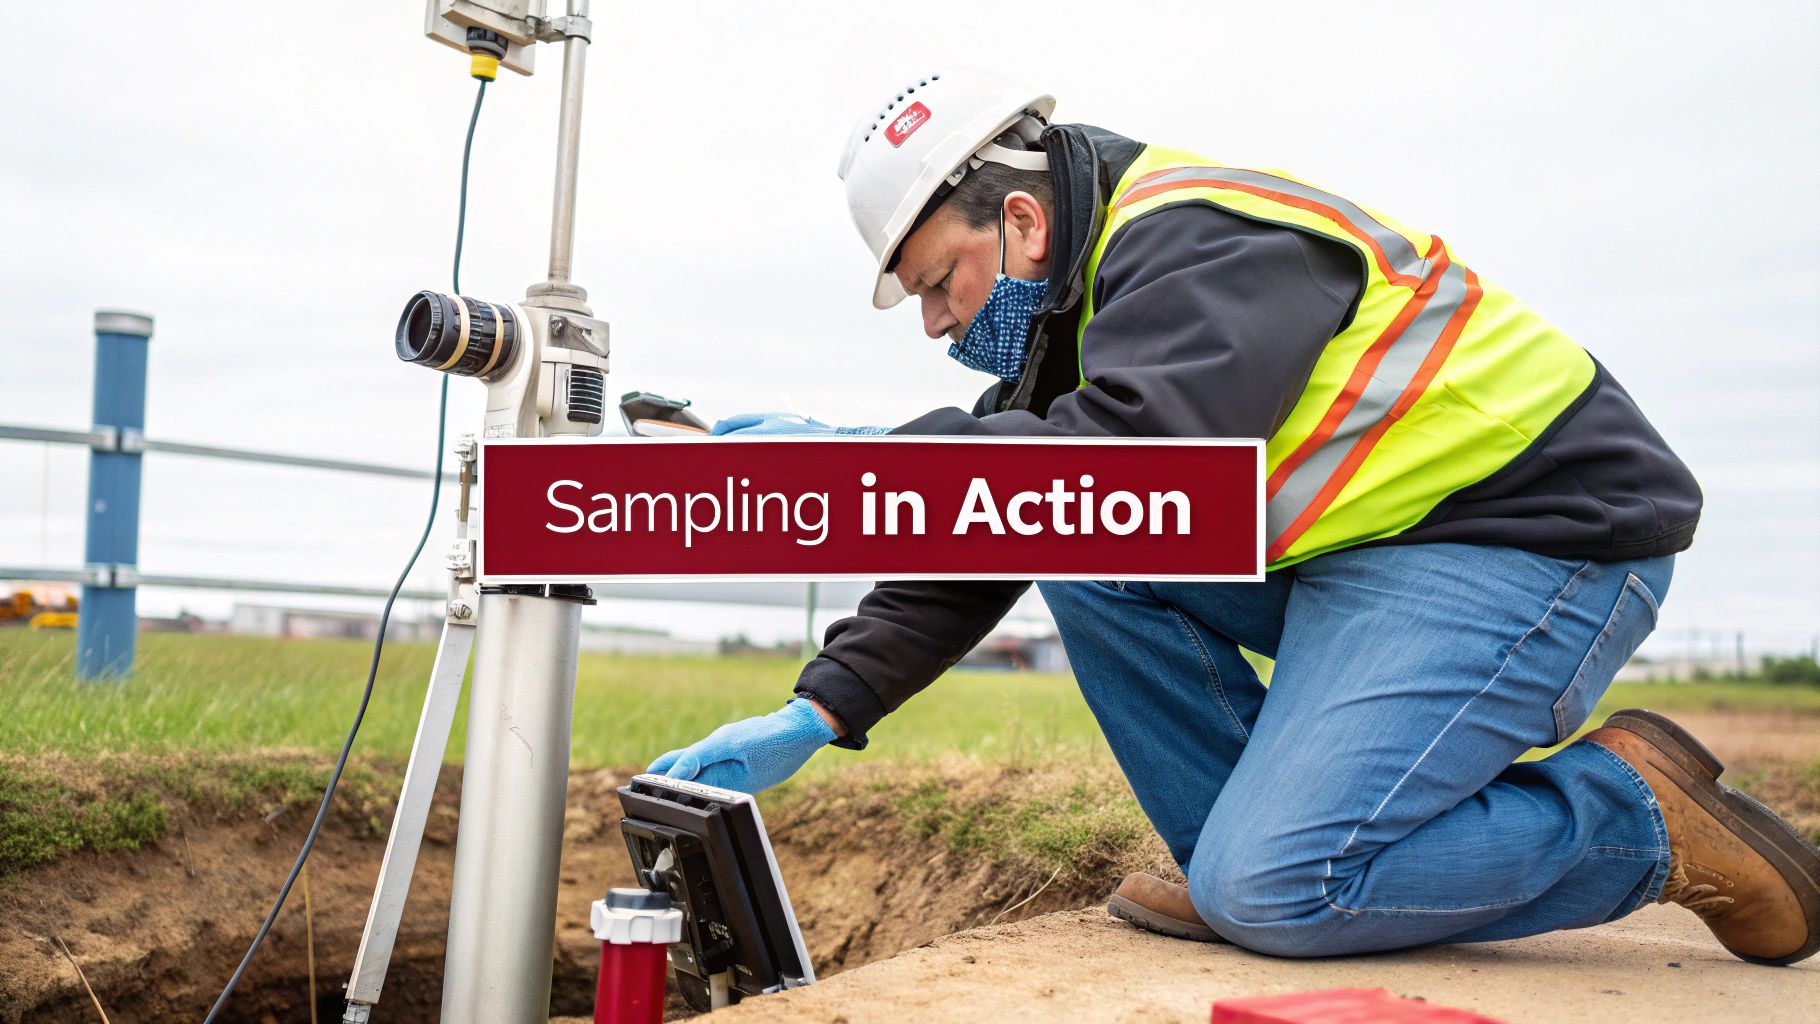
Alright, you've done the prep work and have your gear ready. Now it's time to move from the plan to the plant floor. Executing your on-site sampling for a grain dust assessment is where theory meets reality, and your attention to detail will make all the difference.
This isn't just about collecting samples. It’s about capturing an accurate snapshot of what’s happening during a typical workday in your facility. Every site has its own rhythm, so a cookie-cutter approach just won’t cut it. Your strategy needs to flex to match the specific jobs, shifts, and conditions you're dealing with.
Deciding How to Sample
The goals you set earlier will directly influence the sampling methods you choose. Generally, you'll be looking at three main approaches: task-based, full-shift, and area sampling. Getting this right is key to collecting data that actually helps you make smart decisions.
-
Task-Based Sampling: This is all about zeroing in on a single, high-risk activity. Think of someone sweeping out a grain bin or working the bagging line. It's the perfect way to pinpoint those moments of peak exposure that might otherwise be diluted in a full-day average.
-
Full-Shift Sampling: Just like it sounds, you have a worker wear a personal sampler for their entire shift. This is the gold standard for calculating the Time-Weighted Average (TWA), which you'll compare directly against SafeWork Australia’s Workplace Exposure Standards. It gives you the clearest picture of an individual's total daily exposure.
-
Area Sampling: Instead of attaching a monitor to a person, you place static samplers in fixed locations. This method is great for checking the overall effectiveness of your engineering controls, like a new dust extraction system, rather than measuring a specific worker's exposure.
For a thorough grain dust assessment, you’ll likely end up using a combination of these. You might have area monitors running to see if your ventilation is doing its job, while also having workers in that same area wear personal samplers to ensure their individual exposure is still under the limit.
A Real-World Example: The Grain Receival Pit
Let's make this practical. Picture yourself at a truck receival pit—a classic hotspot for grain dust.
Your main concern is the equipment operator who oversees the grain dumping. This person is right in the line of fire, so their potential exposure is your top priority.
First up, you'd fit the operator with a personal sampler and have them wear it for their entire shift. This is non-negotiable. It will measure their TWA exposure, capturing everything from the intense dust clouds during a dump to the quieter periods in between. This data is your most critical piece of the puzzle for protecting their long-term health.
Then, you would set up a couple of static area monitors. I'd place one near the control booth where the operator hangs out between loads. The second would go closer to the pit itself—but safely out of the way of traffic—to get a read on the general dust levels in that immediate work zone.
This hybrid approach gives you a much richer story. The personal sampler tells you exactly what the operator is breathing in, while the area monitors show you how far that dust is spreading and if your controls are actually containing it.
Don't Just Collect Samples—Collect Context
The lab results are just one part of the equation. Without detailed field notes, those numbers are practically meaningless. Context is absolutely everything when it's time to interpret your findings.
Expert Insight: I can't stress this enough: your field notes are as valuable as the physical sample. A high reading doesn't tell you much unless you can tie it back to a specific task, the weather, or an operational issue that was happening at that exact moment.
You have to be relentless with your documentation. For every single sample, you need to be scribbling down a list of variables. This is what connects a high dust reading to its root cause, which is what you're really trying to find.
Your field notes absolutely must include:
- Environmental Conditions: What's the temperature and humidity? Dry, low-humidity days can lead to shocking spikes in dust levels.
- Grain Type and Condition: Were you handling corn or barley? Was the grain noticeably dry or brittle? These factors dramatically change how much dust is produced.
- Observed Work Practices: What was the worker actually doing? Did you see someone using compressed air for cleaning, kicking up huge clouds of dust? Were they standing downwind of the source?
- Control Measures in Use: Was the dust extraction system on? Did it seem to be pulling air effectively? Make a note of it.
This level of detail turns your assessment from a simple box-ticking exercise into a powerful diagnostic tool. It lets you identify not just that a problem exists, but why it exists. And that's the crucial first step to fixing it for good. These principles of meticulous observation are universal in hazard monitoring, much like the systematic approach required for air monitoring for silica dust, which also relies on rigorous on-site data collection to be effective.
Turning Your Dust Data into Real-World Protection
Getting the lab results back is a major milestone, but it's not the finish line. Raw data is just a bunch of numbers on a page; the real work begins when you translate those numbers into practical changes that make your workplace safer. A successful grain dust assessment doesn't just produce a report—it drives action.
Your first move is to stack those lab results up against the Workplace Exposure Standards (WES) set by SafeWork Australia. This is your compliance benchmark. You'll calculate the Time-Weighted Average (TWA) for each worker you monitored, which gives you their average exposure level over a typical eight-hour workday.
If a worker's TWA comes in under the WES, that’s fantastic. It’s a good sign your existing safety measures are doing their job. But if it creeps over that limit, the clock starts ticking. It's a clear signal that you need to intervene, and fast.
Following the Hierarchy of Controls
When you see a high reading, the gut reaction might be to just hand out more masks. But that's a classic rookie mistake. The most effective safety strategies are built on a framework called the hierarchy of controls. It’s a top-down approach that prioritises the most reliable and permanent solutions first.
This hierarchy is your roadmap, ordered from most effective to least:
- Elimination: Can you get rid of the hazard altogether?
- Substitution: Can you replace the hazardous process with a safer one?
- Engineering Controls: Can you physically separate people from the hazard?
- Administrative Controls: Can you change how people work to reduce their exposure?
- Personal Protective Equipment (PPE): Can you protect the worker with gear?
In a grain facility, completely eliminating or substituting grain just isn't an option. It's the nature of the business. That means your focus after a grain dust assessment will almost always land on implementing robust engineering and administrative controls.
Engineering Controls: Your Heavy Hitters
Engineering controls are physical, built-in changes to the workplace that tackle dust at its source. Think of them as permanent fixes that work 24/7 without anyone needing to flick a switch or remember a procedure.
A classic example is installing a local exhaust ventilation (LEV) system. Picture a conveyor transfer point where grain cascades from one belt to another, kicking up a plume of fine dust. A well-designed LEV hood positioned right at that spot can suck up up to 90% of that airborne dust before it ever reaches a worker's breathing zone.
Water suppression is another powerful engineering tool. A detailed Australian study from 2003 on grain loading operations is pretty eye-opening. Researchers found that during unmitigated tasks, dust levels at transfer points could skyrocket to over 70 milligrams per cubic metre. But when they introduced a simple water spray system, dust levels plummeted by 30–50%. You can dig into the specifics in the full study on grain dust suppression methods.
Key Takeaway: Engineering controls are your most powerful tool. They permanently reduce the hazard at its source, providing a layer of protection that doesn't depend on an employee remembering to follow a procedure.
Administrative Controls: Changing How People Work
When engineering controls alone can’t get you all the way to a safe level, you bring in administrative controls. These are all about changing work practices, policies, and procedures to minimise workers' time in the hot zone.
Let's take a high-dust job like cleaning out a silo. Instead of having one person do it for an entire shift, you could implement job rotation. By limiting any single worker to just two hours in that environment, you dramatically cut their individual TWA, even though the dust level in the silo itself hasn't changed.
Other smart administrative controls you see in grain facilities include:
- Creating Restricted Zones: Clearly marking off high-dust areas and making them off-limits to anyone who doesn't absolutely need to be there.
- Updating Cleaning Protocols: Outlawing the use of compressed air hoses for clean-up—which just blows dust everywhere—and making industrial vacuums with HEPA filters the mandatory standard.
- Boosting Your Training: Moving beyond a once-a-year slideshow to regular, hands-on training that covers the specific dust hazards on your site and the exact procedures for controlling them.
These strategies are effective, but they have an Achilles' heel: they rely on people consistently doing the right thing.
PPE: The Final Barrier
At the very bottom of the hierarchy, we find Personal Protective Equipment (PPE). This should always be your last resort, not your first choice. Respirators come into play only when you've exhausted all other reasonably practicable controls and still can't get exposure levels down into the safe zone.
Just handing someone a mask isn't enough. The type of respirator has to be right for the job—for fine organic dust, that typically means a P2-rated filter in Australia. Far more important, however, is the fit. A mask that doesn't form a tight seal on the wearer's face is little more than a decoration, as contaminated air will just leak in around the edges.
This is why professional fit-testing is non-negotiable. Every single person who needs to wear a tight-fitting respirator must be tested to ensure the specific make and model they're issued creates a perfect seal for their face shape. Back that up with regular training on how to inspect, clean, and store their respirator, and you'll make this last line of defence as effective as it can possibly be.
Answering Your Grain Dust Assessment Questions
Even with the best plan in place, it's natural to have questions when you're getting into the nitty-gritty of a grain dust assessment. Getting these details right is what turns a procedural task into a meaningful safety improvement. Let's tackle some of the most common queries that come up.
Think of this as your go-to guide for those "what if" moments. We'll clear up the confusion so you can move forward with confidence.
How Often Should We Be Doing This?
There’s no one-size-fits-all answer here. The right frequency for your grain dust assessment really hinges on what's happening at your specific facility. The best approach is to start with a comprehensive assessment to establish a solid baseline.
From there, you'll need to reassess whenever a significant change occurs. For example:
- You’ve installed a new conveyor system or changed your workflow.
- New machinery has been brought in, or older equipment has been modified.
- You've just implemented a new control measure, like an upgraded ventilation system. You need to test it to make sure it's actually working as intended.
If your initial assessment reveals dust levels are creeping close to the Workplace Exposure Standard (WES), it’s a smart move to switch to a more regular schedule, like an annual review, until you get those numbers well under control.
Can We Just Do the Assessment Ourselves?
Your internal team is perfectly positioned for routine visual checks—and they absolutely should be doing them regularly to spot obvious dust build-up. But when it comes to a formal, quantitative assessment, it’s a different ball game entirely.
To get data that’s not just accurate but also legally sound, bringing in a professional is the way to go.
An experienced occupational hygienist arrives with properly calibrated equipment and a deep knowledge of correct sampling methods. More importantly, they know how to interpret the results in the context of Australian safety regulations. A botched in-house assessment can lead to a false sense of security, which is incredibly dangerous.
Their expertise ensures the entire process is up to standard, from planning the sampling strategy right through to the final report. This gives you solid, dependable data you can act on.
What's the Difference Between Inhalable and Respirable Dust?
This is a crucial concept to get your head around, as it’s central to understanding the health risks. While the names are similar, they refer to dust particles that behave very differently in the body.
Inhalable dust includes any particle that’s small enough to be breathed in through your nose or mouth. These are generally larger particles that get caught in the upper airways, like your throat and nasal passages.
Respirable dust is the real problem. These particles are much, much finer. They’re so small they can slip past the body’s natural defence systems and penetrate deep into the lungs where gas exchange happens. It's here they can cause serious and permanent damage. While both types are measured, the Australian WES for grain dust specifically focuses on the inhalable fraction. Knowing this helps you target your control strategies where they matter most.
We provide expert occupational hygiene services to ensure your workplace is safe and compliant. Our team offers comprehensive grain dust assessments, helping you identify risks and implement effective control measures to protect your team and your operations. To create a safer work environment, explore our occupational hygiene services.


